Cloning Disks
Clonezilla is an OS that you can boot into with a wide variety of disk tools. This procedure details steps to clone one disk to another, assuming the source disk is smaller or the same size as the target disk. Effectively, you’ll be temporarily turning your PC into a disk cloning machine.
![]() BACK UP IMPORTANT DATA BEFORE FOLLOWING THIS PROCEDURE!
BACK UP IMPORTANT DATA BEFORE FOLLOWING THIS PROCEDURE!
Setup
![]() Clonezilla (bootable CD-ROM: CloneZilla Live 2.6.6-15 ISO)
Clonezilla (bootable CD-ROM: CloneZilla Live 2.6.6-15 ISO)
![]() Windows 10 (free/unactivated)
Windows 10 (free/unactivated)
![]() Source Disk: SSD (C:\) 118 GB
Source Disk: SSD (C:\) 118 GB
![]() Target Disk: HDD (E:\) 232 GB
Target Disk: HDD (E:\) 232 GB
![]() Official Clonezilla project documentation:
Clonezilla project
Official Clonezilla project documentation:
Clonezilla project
Boot Into Clonezilla
First, create a Clonezilla Live CD-ROM and boot into it via BIOS settings. This will differ a lot based on your hardware. Creating the live CD-ROM is out of the scope of this procedure. Please follow the official docs to get. Clonezilla has bootable USB options as well, which may be preferred.
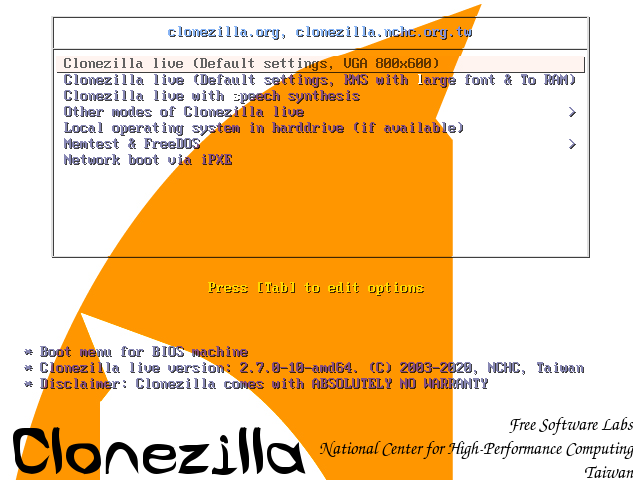
Once Clonezilla boots to the splash screen choose Default settings, VGA 800x600 or whatever is preferred.

Next, select your language and keyboard layout, similarly to how you would install a Linux distro.
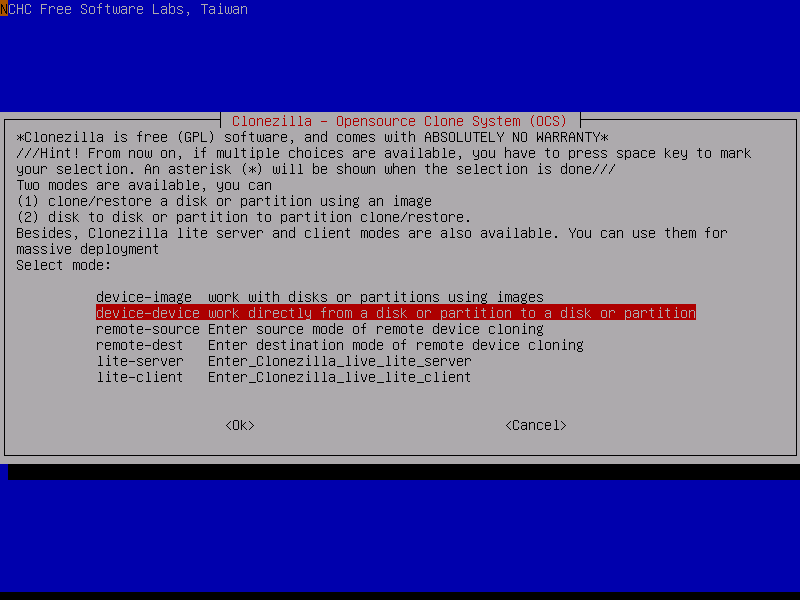
- Select
Start_Clonezilla - Select
device-device

- Choose
Expertmode. This will be important later to get access to more options. - Choose
disk_to_local_disk. Then you will be shown a screen with your actual disks displayed.
![]() WARNING: Make sure you choose the correct
WARNING: Make sure you choose the correct source disk here! This is the disk you want to clone from.
/dev/sda: ST3250318AS_ ST3250318AS_5VMPM1CY 250GB
/dev/sdb: M4-CT128M4SSD2_ M4-CT128M4SSD2_00000000114708FF31FE 128GB
- Choose your
targetdisk. In this example, there is only one option,sda. Your setup may differ. - Select
-sfsck - Check
-k1from the advanced options and keep the default selections - Choose
-pa poweroffto shutdown machine when finished cloning
Press ENTER to continue, then “yes” to all warnings and “yes” to write over boot sector.
Now wait for the cloning process to complete.
Expanding Disk Volume (Windows)
If you’re cloning a disk with Windows installed, it’s possible you may have a “Windows Recovery Partition” allocated. This section details steps to remove that to utilize the full size of your disk after cloning in the previous step.
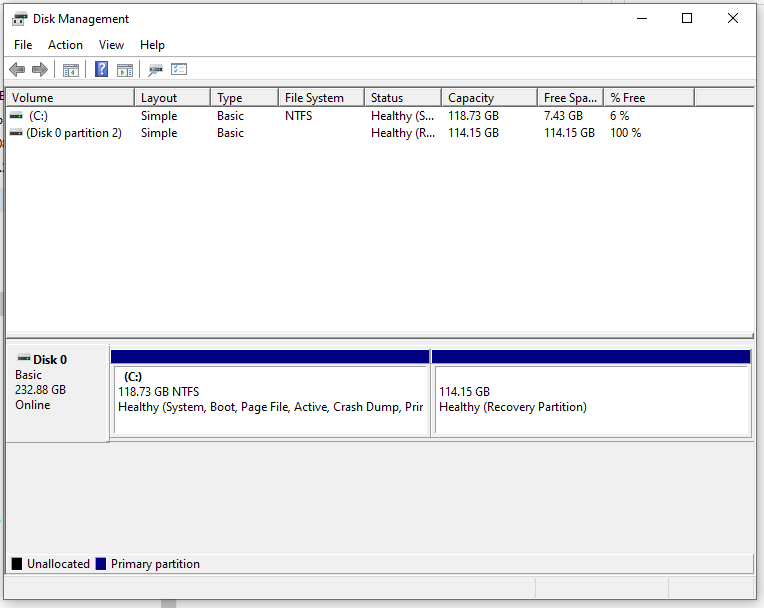
Open Windows disk management tool via opening Windows search tool and searching disk management and selecting
Create and format hard disk partitions.

In Windows search tool, type cmd to open the “Command Prompt”. Right-click it and select “Run as Administrator.
In command line, enter the command diskpart and press ENTER. This will drop you into the diskpart command line
application. Type in list disk to see what you’re working with.
![]() Be careful to select the disk you just previously cloned to.
Be careful to select the disk you just previously cloned to.
In this example, I only have one disk connected to the machine, which is Disk 0. This disk has two partitions, the
primary C:\ and the “Windows Recovery” partition that I want to get rid of.
Enter in select disk 0.
DISKPART> select disk 0

Disk 0 is now the selected disk.
To see its partitions, enter list partition
Partition ###   Type        Size        Offset
-------------   -------     ------      -------
Partition 1     Primary     118 GB      1024 KB
Partition 2     Recovery    114 GB       118 GB
It is clear from the program output that the Recovery partition is Partition 2.
- Type
select partition 2, assuming it is theRecoverypartition, yours may differ - Type
delete partition overrideto erase the partition
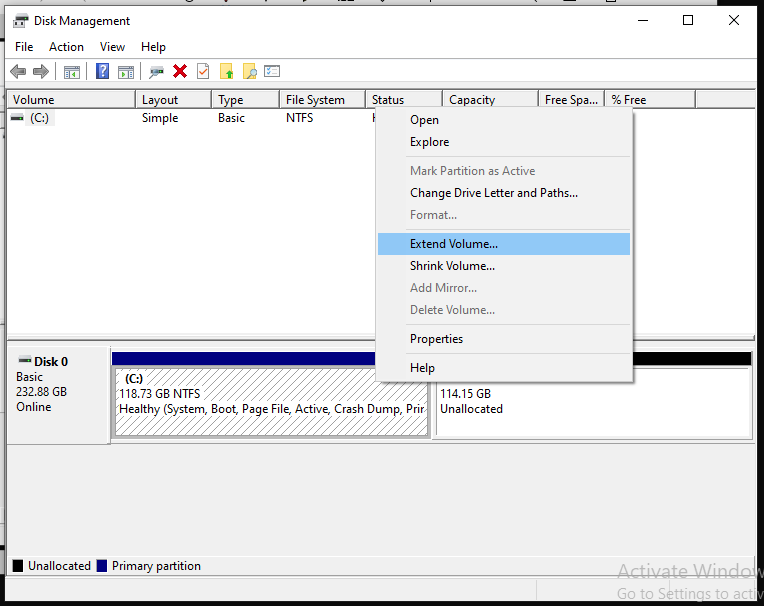
Finally, go back into Windows Disk Management program. You should now see that the sector on disk is Unallocated,
meaning it is dead space that the system cannot use. In short, the OS cannot write or read from this area of disk. We
need to Right-Click on the C:\ drive, or whichever you have in your case, and select Extend Volume...
This will open up an “Extend Volume Wizard”. Configure the settings however you wish, but in most cases you will want to use the default allocation settings to use the entire Unallocated Volume size.

After running the Wizard, you should see your volume is now utilizing the full size of your disk within a single volume.
![]() The Extend Volume function only works for volumes that are adjacent.
The Extend Volume function only works for volumes that are adjacent.
Sorc Lab, LLC. All Rights Reserved. Anyone is permitted to copy and distribute verbatim copies of this document under the terms of the GNU FDL Free Documentation License.
